

Developing for Android with a local REST API server


When you're building an Android app, chances are that it'll be interacting with the internet in some way. More often than not, this is through the use of REST API.
First, a refresher
Ideally, you'd have a couple of base URLs, one for production usage, and one for testing purposes. You also have several endpoints which expose your resources, and everything is hosted somewhere on the web, which could be on-premises or on the cloud. When you're building your Android app, you use a library like Retrofit and a JSON converter like gson or Moshi to interact with the API.

Here, the segment in bold is your base URL and the text after the /, typically called the last path segment, that's your endpoint.
What if your API isn't hosted anywhere (yet)?
Say you're working for a smaller company that wants to save on hosting costs or you're working on a personal project and saving on hosting costs, so you don't deploy the 'dev' or 'test' version of your API to a proper server. You can of course run everything locally and work from there, but how do you connect it to your Android app? What's your BASE URL? How does your app access it?
It's pretty easy actually, barely an inconvenience
These steps will allow your app on an Emulator/Physical device to interface with the server running on your development machine:
Set up the endpoints on Retrofit (or any other networking library that you may use). An endpoint may look like this:
/user,/add,/movie/popularRun the server on your development machine (PC?), and keep the port number in mind. It could be 3000, 8080, or something similar.
Once your server is up and running, it'll be available on this URL :
http://localhost:<port number here>For example,
http://localhost:3000/This will serve as your
BASE_URL. The actual address of localhost is127.0.0.1. You can use this instead oflocalhostas well. Just don't forget to add the port number at the end!Notice that in your base URL, the protocol is HTTP and not **HTTPS**. Android does support both, but HTTP support isn't enabled out of the box anymore. If you want to use it, you can add a line in your
AndroidManifest.xmlfile, under the application tag that'll let you use HTTP.<application <!-- ..... --> android:usesCleartextTraffic="true" <!-- ..... --> </application>You probably don't want to have this flag enabled in production as it's not exactly the best security practice. A solution is available here.
Once your code is set up and your server is running, all you need to do is forward your server port from your development machine to the device that's running your app. This allows your test device to communicate with the server and can be simply achieved using
adb, the Android Debug Bridge. If you don't have adb, you can find instructions to install it here. Once you have adb, execute this to forward the port:adb reverse tcp:<port number here> tcp:<port number here>
Assuming your server is running on port 3000, your command would be:
adb reverse tcp:3000 tcp:3000
This forwards your development machine's port 3000 to your phone's port 3000. You can forward to any port on your device if you want of course, but we're keeping it the same for simplicity's sake.
Psst, If you're an Android Developer or hobbyist, adb can do a lot more than forwarding ports for you. Some cool examples on this github gist.
That's it. That's all that you need to do.
Some steps need to be done only once, like setting up your endpoints, your manifest, and your BASE URL. Second usage onwards, you just need to spin up your server and forward the right port! You get fast API access while keeping your costs at zero!
Bonus: Different base URLs for different builds
When it comes time to deploy (or maybe your prod server is already deployed?), you might want to keep different versions of your base URL, one for debug, and one for prod at the very least. You can do so by adding a build config field in your app-level build.gradle, and it's extremely easy. All Android projects have two different build types, debug and release by default. You can add more if you like of course, but for these two, you can easily configure different base URLs and even API keys. This is how you do that:
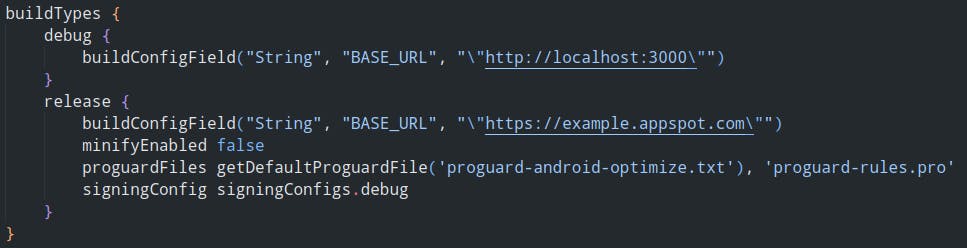
So you see, both debug and release variants have a buildConfigField, called BASE_URL. Once that's done, you can use them anywhere in the code by referring BuildConfig.BASE_URL as in here:
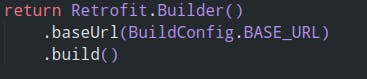
The right BASE_URL will be picked for you automatically depending on your selected build variant.